How to Carve a Pumpkin That Lasts
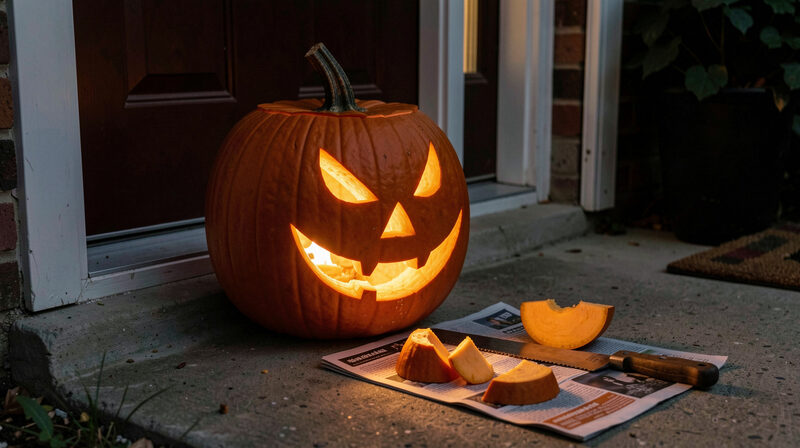
A carved pumpkin is a fruit with a wound in it, and it behaves accordingly. It softens, it shrinks, it grows mould and it collapses. The difference between a lantern that looks right for a week and one that slumps by the second morning is almost entirely a matter of order and method, not talent. This page sets out the sequence that works, from the market stall to the night itself.
Choose the right pumpkin
Start with the fruit, not the design. Look for a pumpkin with a firm, even shell and a sound, dry stem. A soft spot anywhere on the surface will rot faster once the inside is exposed. A flat base matters more than size, because the lantern has to sit without rolling. For carving, a pumpkin of medium size with a wall thick enough to hold a shape but thin enough to cut is easier than a huge one. A pumpkin grown for eating is often thinner walled than one grown for display, and either can work if the shell is sound.
Wash and dry it first
Before any cut, wash the outside and dry it thoroughly. Soil and damp on the surface carry mould into the cuts. A pumpkin that is dry when it is carved lasts noticeably longer than one that is carved wet. This step takes a minute and is the one most often skipped.
Cut a lid that goes back on straight
Cut the lid with a saw or a strong knife, and cut it as a shape rather than a plain circle. A notch or a pointed corner on one side of the lid means it can only go back on in the right position, which keeps the top aligned. Angle the blade inward slightly as you cut so that the lid rests on a ledge instead of falling through. Cut a lid wide enough for your hand and a scoop to pass through. Keep the lid with the pumpkin, because it will be needed later.
Scoop the seeds and thin the wall
Scoop out the seeds and the loose pulp with a spoon or a scoop, working down to the firm flesh. Save the seeds if you intend to roast them. Then thin the inside wall where the face will be cut, because a thick wall blocks the light and makes the carving harder. Scrape the inner surface evenly until the wall is roughly two to three centimetres thick at the front. This single step does more for the finished lantern than any pattern.
Mark the pattern before you cut
Draw the design on paper first, then transfer it to the pumpkin with a marker or by pinning a paper template and pricking through the outline. A simple, bold face reads better from the pavement than a fine, detailed one. If you are carving a picture rather than a face, keep the elements large and well separated. Cut the smallest pieces first, because the shell is strongest before it is weakened by other cuts.
Carve with a saw, not a knife
A small serrated saw made for the job gives more control than a kitchen knife and is far safer for the hand. Cut with a gentle back and forth motion and let the saw do the work. Push the cut pieces out from the inside, not the outside, so that the edges stay clean. Do not cut all the way through a narrow bridge if it is meant to hold, and leave a margin around the base so the pumpkin does not split.
Dry the cuts and seal the edges
After carving, dry the inside and the cut edges. A thin smear of petroleum jelly or vegetable oil on the exposed flesh slows the loss of moisture, which is what causes most of the collapse. Some people use a very dilute bleach solution to slow mould, and this works, but it must be weak and the pumpkin must be dried again afterwards. The important point is that moisture and warmth, not time alone, are what break a carved pumpkin down.
Light it without fire
Use a battery powered light or a small LED candle rather than a flame. A flame inside a pumpkin on a wooden step is a fire risk, and it also cooks the inside of the fruit and speeds its decay. An LED gives a steady glow, runs cool and can be left on all evening. The wider question of lighting a porch safely is treated in the decorating and carving section.
Keep it cool and check it daily
A carved pumpkin lasts longer in a cool, dry, shaded place than in a warm room. If the night is mild, bringing the lantern inside after the visitors have gone will add days to its life. Check it each morning and remove any soft or mouldy part immediately, because rot spreads from a single point. A lantern that has begun to collapse cannot be saved, but it can be replaced, and the seeds of the next one can be dried for planting, a process explained by the Royal Horticultural Society in its guide to growing pumpkins.
Why the order matters
The sequence above is not fussy. Each step removes a cause of early failure: a wet surface, a thick wall, a jagged cut, a hot flame, a warm room. Followed in order, it turns a fruit that would last a day into a lantern that lasts a week. The history of why we carve at all is a separate story, told at the jack o lantern.